Facial Expression Using Morpher in 3D Studio max
Facial Expression Using Morpher in 3D Studio max
Introduction
Various setups and rigs are there for lip sync and facial expression .The easiest way to create a set of predefined facial expressions based on morpher modifier can be applied to animate moods and lip synchronization is explained in this tutorial.
Head Setup for Facial Expression
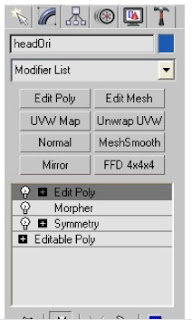
Most models are modeled half to create a perfect symmetry .The symmetry modifier is efficient in this way .However the edge of the model should be aligned to grid to be efficient as well as to prevent mistake when welded with its true center .Lastly it is to allow the rigger to paint weights correctly .The symmetry modifier should not be collapse unless both sides of the face intended to be different .In most cases due to complex facial setups,mirror modifiers and symmetry will collapse.We will retain modifier for this small setups
Next Clone the head to several other models.These other models are used to create
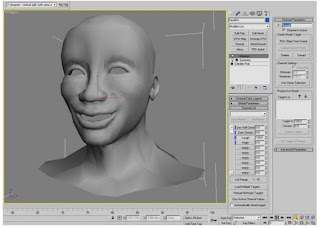
different features for expressions or lip sync.The several heads will be modeled to desired features.Keep the original head unchanged.Few examples that are interesting to work on are eyelids,a smiling faze and angry face.
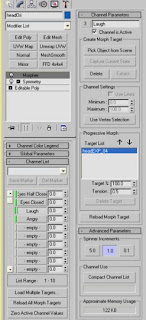
When you tweak the clone models,keep in mind how facial muscles move.An example would be a smiling face.When the mouth twiched into a smile,the muscles will affect the cheeks and slowly ,easing off to the temples.One good practice is to observe muscle reactions by acting in front of a mirror.That way you will get most of the features right.Once you are satisfied with your facial features,we will move on to add these expressions to your original head. In The modifier list dropdown window,select Orpher,In Morpher,there are sub categories or channel color legend,Global Parameters,Channel List,Channel Parametere and Advance Parameters.
Creating A series of FAcial Feature/Expressions
The empty slots are used to assign the tweaked models.
- Select the first empty slot.
- Click Pick Object from Scene
- Select the model with the expression
- To check the toplogy of the morph targets(s) that are assigned to the Original head ,increase the number in the parameter feld of the selected slot.
- Repeat for other facial expressions

If the model did not morph into the expression that was assigned after keying the parameters ,check the Target List Under Progressive Morph.If there is nothing in the list,it means no tweaked model has been assigned to the selected slot.
You may also want to change the Spinner Increments to 0.1 If you want the animation to be smoother or more subtle.
A good work habit for recommendation is to save the heads to a separate MAX file after you are done as you can delete the heads in the scene without compromising the effects.However,It will be quite hazardous if you did not keep a copy of the clones hould you have a need to change or tweak them.
After you deleted the clone models,the slot activation color will be changed from green to blue.The heas is now ready for animation,An important thing to note is that if you adjust the othere parameter of the morph slot without first zeroing offthe previous parameter,the deformation will stack.It simply meant that if you animate your character to smile and decide to hange it to an angry expression ,you should key your smile slot backt to zero before keying the angry slt to hundred.It is because your angry model deformation will add to the smile deformation model,causing it to deform frther if you did not zero out the parameters correctly.

Lastly ,in order to attact the head back to the body ,edit poly modifer has to be added to attact and weld the body vertices back to its original state


0 comments:
Post a Comment