ETABS
ETABS and Primavera Project Planner Tutorials and Topics coming soon this week
Read more...Civil Engineering Blog with free video tutorials,and setups of sap2000,Etabs,safe,Autocad,Revit Architecture,primavera,MSproject,GIS,matlab,Papice,C++,and much more softwares
Analysis and Design of Truss using Staad Pro

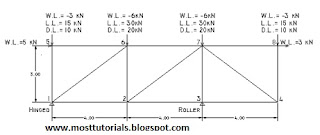
The above figure shows a truss from several truss supposed to cover certain area.As shown the truss has a cantilever part ,its span equals 4 meters.The proposed truss depth is 3 m.The loads are shown as concentrated on tuss joints.The values of its load case are shown .
Use all the data you take in steel course to design and analyze steel truss.
Main Steps Of Modeling Truss in STAAD PRO
 Click the picture to enlarge
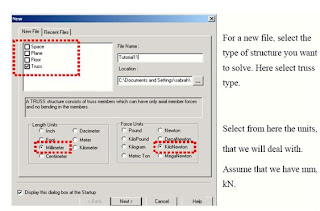 In New File select
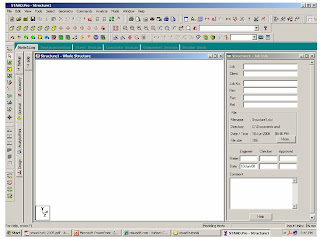
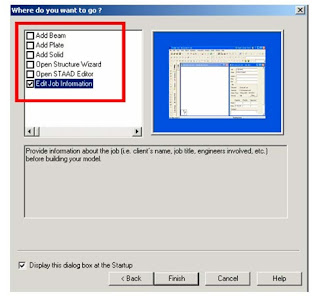 The staad Graphical interface will appear as shown in below picture
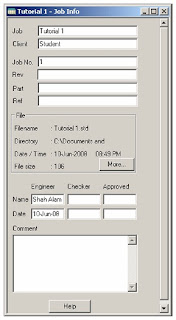 2-Building Model (structure) Geometry
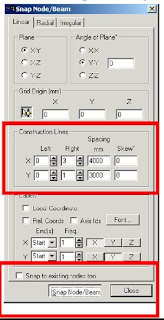
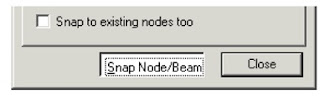
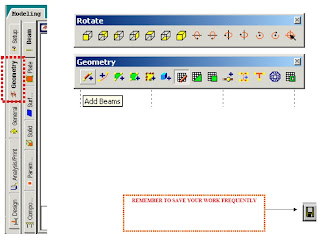 After clicking Snap Node/Beam ,use the mouse and connect between nodes created at the intersections of construction lines
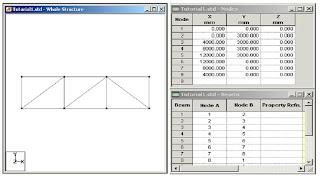
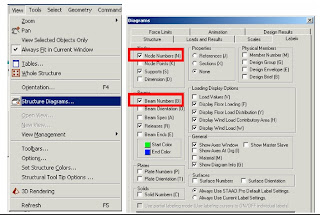
 Node and beam labels are a way of identifying the entities we have drawn on the screen, and very useful when dealing with the output results

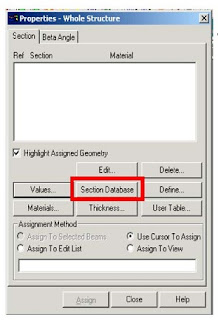
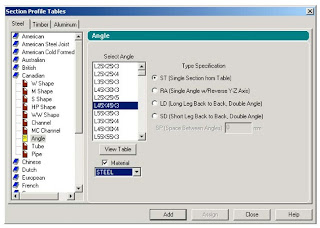

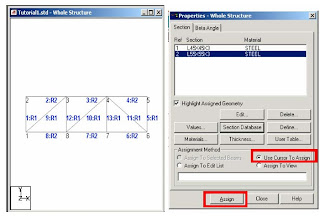 Supports
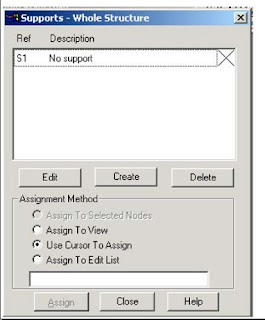


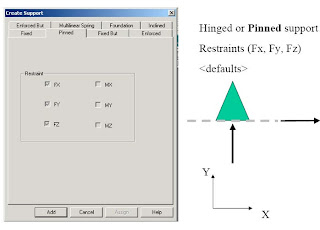
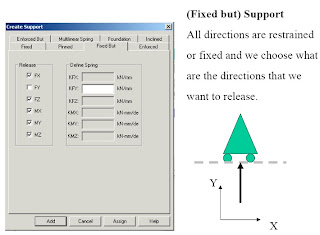

 1. First, we will be creating all 3-load cases.
 For example


 and In Dead Load Create the Self weight as
 In each Load Case Creat the Nodal Loads on truss as specified before.Make sure of the direction of forces acording to global coordinates


 After Creating the commond of (Perform Analysis-Check);We have to assign the members that want to be this type of analysis for it.
 Pre-Print
 For example here we have choosen to print the support reactions,member forces,joint displacements

 6-Defining Design Requirements
 There are many Design Commands in the STAAD Design subroutine.Here,we will use only to Check Code,regarding adequacy of members.


 When you select the Run Analysis option from the Analyze menu,the following dialog box appears.We are presented with the choice of 2 engines.the STAAD engine and the STARDYNE Advanced Analysis engine.The STARDYNE Analysis engine is suitable for advanced problems such as Buckling Analysis,ModaL Extraction using various method ,etc
 The soloving process is shown in pop up screen.


 Note
Note
 The Output File
 The End..
Symbolic Expressions, Variable Precision, and Exact Arithmetic
As we have noted,MATLAB uses floating point arithmetic for its calculations.
Using theSymbolic Math Toolbox,you can also do exact arithmetic with symbolic expressions. Consider the following example:
>> cos(pi/2)
ans =
6.1232e-17
17
The answer is written in floating point format and means 6.1232×10⁻¹⁷ .
However, we know that cos(p/2) is really equal to 0. The inaccuracy is due
to the fact that typing pi in MATLAB gives an approximation to pi accurate
to about 15 digits, not its exact value. To compute an exact answer, instead
of an approximate answer, we must create an exact symbolic representation
of p/2 by typing sym(’pi/2’). Now let’s take the cosine of the symbolic
representation of p/2:
>> cos(sym(’pi/2’))
ans =
0
This is the expected answer.
The quotes around pi/2 in sym(’pi/2’) create a string consisting of the
characters pi/2 and prevent MATLAB from evaluating pi/2 as a floating
point number.The command sym converts the string to asymbolic expression.
The commands sym and syms are closely related. In fact, syms x is equiv-
alent to x = sym(’x’). The command syms has a lasting effect on its argu-
ment (it declares it to be symbolic from now on), while sym has only a tempo-
rary effect unless you assign the output to a variable, as in x = sym(’x’).
Here is how to add 1/2 and 1/3 symbolically:
>> sym(’1/2’) + sym(’1/3’)
ans =
5/6
Finally,you can also dovariable-precision arithmetic with vpa.For example,
v
to print 50 digits of 2, type
>> vpa(’sqrt(2)’, 50)
ans =
1.4142135623730950488016887242096980785696718753769
Algebra
Using MATLAB’s Symbolic MathToolbox, you can carry out algebraic
or symbolic calculations such as factoring polynomials or solving algebraic
equations. Type help symbolic to make sure that the Symbolic Math Tool-
box is installed on your system.
To perform symbolic computations, you must use syms to declare the vari-
ables you plan to use to be symbolic variables.
Consider the following series of commands:
>> syms x y
>> (x - y)*(x - y)ˆ2
ans =
(x-y)^3
>> expand(ans)
ans =
x^3-3*x^2*y+3*x*y^2-y^3
>> factor(ans)
ans =
(x-y)^3
Notice that symbolic output is left-justified, while numeric output is
indented. This feature is often useful in distinguishing symbolic output
from numerical output.
Although MATLAB makes minor simplifications to the expressions you
type, it does not make major changes unless you tell it to. The command ex-
pand told MATLAB to multiply out the expression, and factor forced MAT-
LAB to restore it to factored form.
MATLAB has a command called simplify, which you can sometimes use
to express a formula as simply as possible. For example,
>> simplify((xˆ3 - yˆ3)/(x - y))
ans =
x^2+x*y+y^2
MATLAB has a more robust command, called simple, that sometimes does
a better job than simplify. Try both commands on the trigonometric
expression sin(x)*cos(y) + cos(x)*sin(y) to compare — you’ll have
to read the online help for simple to completely understand the answer.
Input and Output
You input commands to MATLAB in the MATLAB Command Window. MAT-
LAB returns output in two ways: Typically, text or numerical output is re-
turned in the same Command Window, but graphical output appears in a
separate graphics window. A sample screen, with both a MATLAB Desktop
and a graphics window, labeled Figure No. 1, is shown in Figure 2–1.
Togeneratethisscreenonyourcomputer,firsttype1/2 + 1/3.Thentype
ezplot(’xˆ3 - x’). While MATLAB is working, it may display a “wait” symbol — for example,
an hourglass appears on many operating systems. Or it may give no visual
evidence until it is finished with its calculation.
Arithmetic
As we have just seen, you can use MATLAB to do arithmetic as you would a
calculator.You can use “+” to add, “-” to subtract , “*” to multiply, “/” to divide,and “ˆ” to exponentiate.
For example,
>> 3ˆ2 - (5 + 4)/2 + 6*3
ans =
22.5000 MATLAB prints the answer and assigns the value to a variable called ans.
If you want to perform further calculations with the answer, you can use the
variable ans rather than retype the answer. For example, you can compute
the sum of the square and the square root of the previous answer as follows:
>> ansˆ2 + sqrt(ans)
ans =
510.9934
Observe that MATLAB assigns a new value to ans witheachcalculation.
Todomorecomplexcalculations,youcanassigncomputedvaluestovariables
of your choosing.
For example,
>> u = cos(10)
u=
-0.8391
>> v = sin(10)
v=
-0.5440
>> uˆ2 + vˆ2
ans =
1
MATLAB uses double-precision floating point arithmetic,which is accurate
to approximately 15 digits;however,MATLAB displays only 5 digits by default.
To display more digits, type format long. Then all subsequent numerical
output will have 15 digits displayed. Type format short to return to 5-digit
display.
MATLAB differs from a calculator in that it can do exact arithmetic. For
example,it can add the fractions 1/2 and 1/3 symbolically to obtain the correct
fraction 5/6.
We discuss how to do this in the section Symbolic Expressions,
Variable Precision, and Exact Arithmetic Post
© Blogger templates Newspaper III by Ourblogtemplates.com 2008
Back to TOP